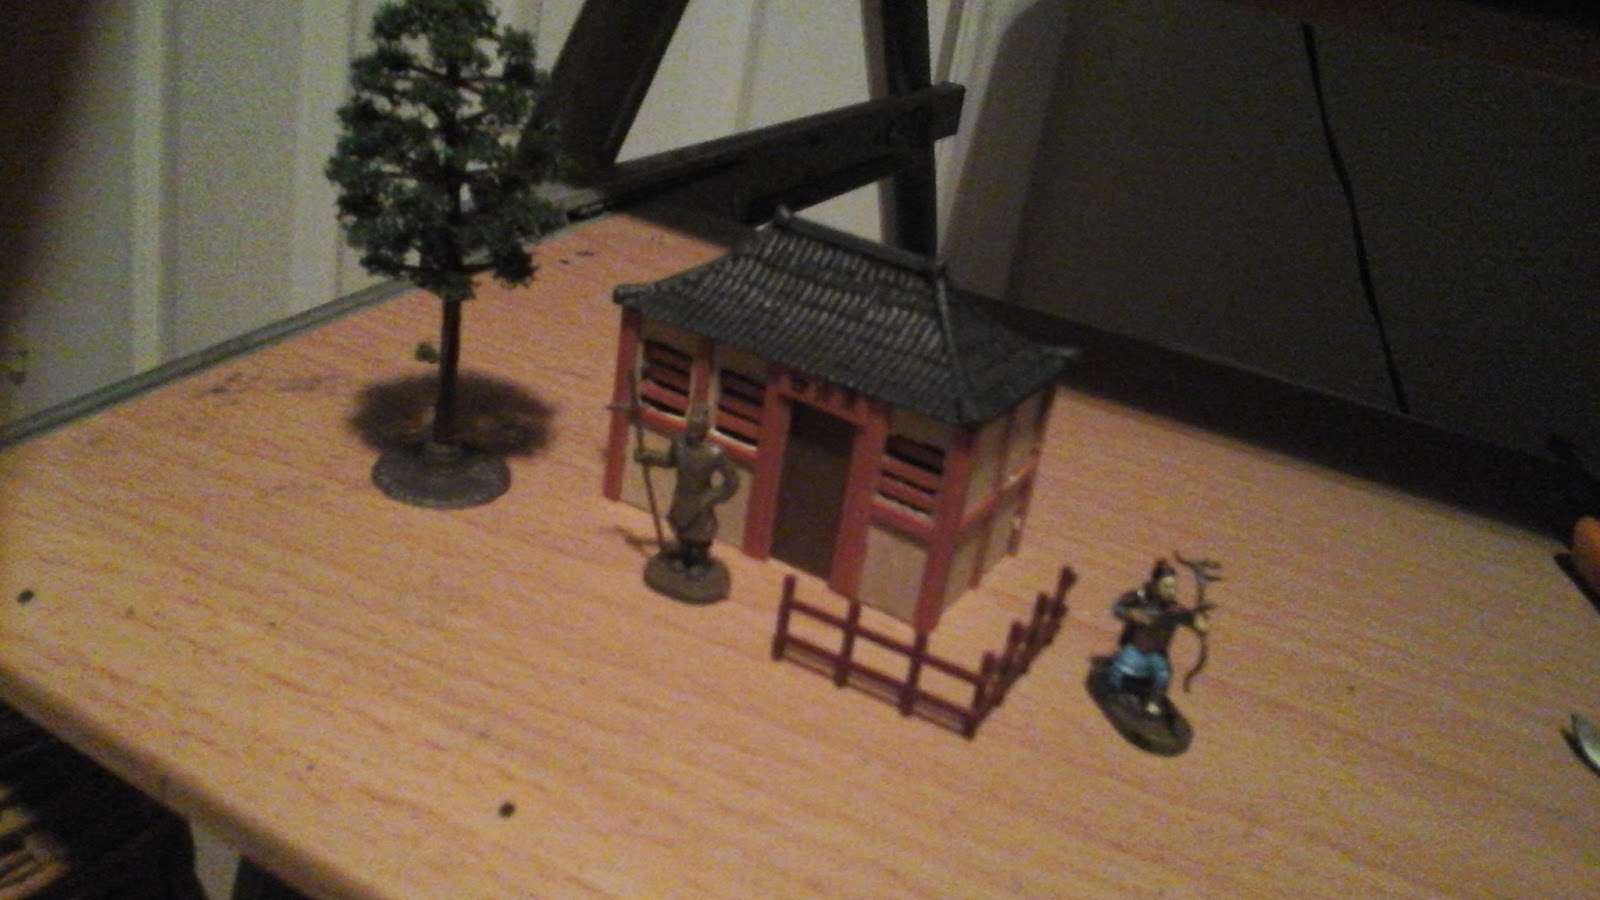
With many joyous memories of the 'Three Kindgoms Fate of the Dragon' PC game from my childhood I've built a small building using fairly easy to get parts.

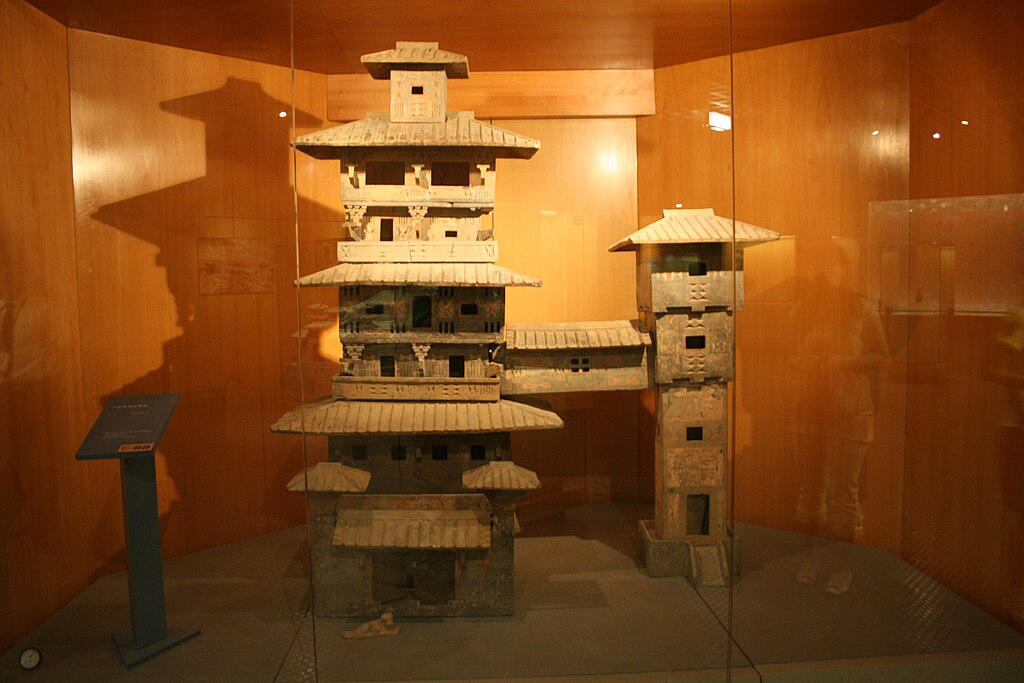
I've based it upon the Han Dynasty ceramic houses above which provide a very good start. The particular house I've based it on is from the Asian Art Museum page: http://education.asianart.org/explore-resources/background-information/introduction-han-dynasty
The parts used:
1 Wills SS 35 Pagoda Building; 1 Wills SS 46 Building Details Pack A; 1 Wills SSMP 214 Cement Rendering
Paints: GW Eshin Grey; GW Mechanicus Standard Grey; GW Doombull Brown; GW Khorne Red; GW Evil Sunz Scarlet; Vallejo 0.950 Black; GW Squig Orange; GW Ushabti Bone; GW Rakarth Flesh
For the fence:
1/72 Hasegawa 31132 Field Camp Equipment
TP model tree? with a Woodland Scenics base

The roof which is used for the building is from Wills Kits Pagoda Building SS 35 from their line of Railway Buildings. The kit is of a corrugated iron shelter, but with a bit of paint- painting on Grey tiles and puttying finials.
I used the sides of the pagoda building as a template for the building walls on the cement rendering sheets. Following the Eastern Han ceramic model I moved the door off to the right with two rectangular windows that I cut out on the left and one on the right. I also added another rectangular window to the building's left sidewall.
After I glued the walls to the base of the roof (taking care to inset them further than the original kit walls by reducing the length of the walls by a couple of mm and moreso the sidewalls) I then attached the wooden framework. This was made from the 3 strips of the Building Accesories A sprue and the inset ridge strip. (Note that the strip next to the chimney pot parts is a mm wider than the other two!) I removed them from the sprues and cut lengths to size with the wall ends which I then glued on.

The advantage of using the Wills building accessories sprue is that the pieces are already the correct colour and don't need to be painted - same with the beige concrete rendering. Nonetheless I recommend painting the roof to hide the sculpted finials and add the tiled look. I then cut more vertical lengths for the centre of the rendered walls- one each for the front and sides and three for the back. I then cut horizontal lengths which I added mid-way across the walls to add to the red painted half-timbered effect. I recommend deciding whether the thicker strips will be used for the horizontal or vertical timbers.

The doorway was made using the thick inset ridge strip of which I cut two lengths for either side of the doorhole. The sign was made using a reversed piece of this strip cut to size with three Archaic Chinese characters painted on it with black paint. (Search for 'Archaic Chinese Characters' on the web for ideas). The door was made by using a reversed piece of the original corrugated sidewall placed upside down and glued on the back of the doorway.
The windows were made with leftover pieces of thin strip in groups of three glued to the inside of the windows. (This is my interpretation of the windows on the Eastern Han ceramic house- although notably on the model there are two wooden slats/bars as opposed to three.)
To remove the plastic effect and shiny glue stains I painted the rendering with GW Ushabti bone and the GW Rakarth Flesh for the stains on the stucco. The wooden framing was touched up using GW squig orange.

The roof was painted (GW Eshin Grey on top of Vallejo Black using GW Mechanicus Standard Grey for highlights) and green stuffing/puttying roof finials it looks quite different. I did this green stuffing by adding cylindrical tile ends to the corners of the roof and the finials at the top of the roof ridge and sculpting the blobs of green stuff into shape with fingers then wet ends of the sculpting tools. (A GW sculpting tool is more than adequate- use the flat sides of the knife- shaped end to flatten the ends and the curved end to smooth and round the tiles). For the top finials I removed the ends of the separate top ridge piece form the Wills kit and adding upstanding curved finials.
The advantage of the Wills Pagoda building roof is that you could buy two or more, carefully cut them apart and glue them together for a longer roof. This is much easier than trying to scratchbuild symmetrical curved roof shapes. The roof could also be used for a gatehouse building or the top floor of a tower as in one of the top ceramic buildings. That said this is not the only style of tiled roof as straight rooves appear to be common as well as well as gabled rooves. Thatch would also not look out of place. That said I am not an archaeologist.
The fence is made of the two pieces from the Hasegawa 1/72 Field Accessories set that I cut one of the pieces' ends into shape to attach to the pole of the other piece to make a corner. I used the house corner as a right angle to set the fence into position with. I then painted the fence with a GW Doombull Brown basecoat and with GW Khorne red coat. For a brighter fence GW Evil Sunz Scarlet could be used for delicate highlights to the red fence.
The tree is from a TP pack of two (I can't remember what the tree was). TP which do a number of unusual trees. I cut the tree bottom to shape and then attached it to a woodland Scenics base from a tree kit set.
The figures are from Caesar Miniatures' Chi'in Army. These figures are unusually large for 1/72 and can be seen here: http://www.plasticsoldierreview.com/Review.aspx?id=796

No comments:
Post a Comment